Module 2 - Form Management
Forms in React
Welcome to the exciting world of forms in React! In this Core Competency, we will dive into the intricacies of building dynamic and interactive forms in your React applications.
Forms are essential to many web applications and have been around forever. Traditional HTML apps use forms to gather user input, such as name, password, address, and comments. Legacy forms trigger an HTTP GET (or POST) message whenever the user submits information, allowing the server to receive and process the data.
You will learn how to use forms with JS and JSX within React applications. React provides powerful tools and techniques to handle forms effectively, including various types of inputs, manipulation of input values, and handling of submit events. You will also explore the concept of controlled versus uncontrolled inputs.
By the end of this Core Competency, you'll have a solid understanding of creating robust and user-friendly forms in React, empowering you to build engaging and responsive web applications. So, let's begin our journey to master forms in React!
Building a basic form
Forms are one of the best ways for companies to gather data from users and get them to interact with their software. Forms have been around for a long time! Every language and framework will handle form data differently, but most of them will build a form using the following HTML elements:
The <form> element represents a document section that contains interactive controls for
submitting information to a web server, wrapping all the inputs and labels under one tag.
The <input> element creates interactive controls for web-based forms to accept user data.
You can specify different inputs by setting the type attribute. The more common values for type include text,
password, checkbox, date, email, and submit.
Along with specifying the input type, the input tag has several other attributes that specify some behaviors. You can see the complete list here.
Here is an example of an input tag with many of its attributes (see if you can deduce what each one does):
<input type="text" id="name" name="name" required minlength="4" maxlength="8" placeholder="Type your name here" />Let's go through what each attribute provides:
- id specifies a unique identifier, just like any other HMTL element, so JavaScript can select and manipulate this element.
- name is used for form submission, along with the actual input from the user, as a key/value pair. It also links this input element to a label (more on this below).
- required tells the form that this field must be filled in before submitting.
- minlength and maxlength require the field to have a certain min and max number of characters.
- The placeholder is the default text shown inside the input, usually used to instruct the user what to type.
The HTML <label> element represents a caption for an item in a user interface. This
element has the attribute for which links the label to an input, positioning the caption
correctly on the screen.
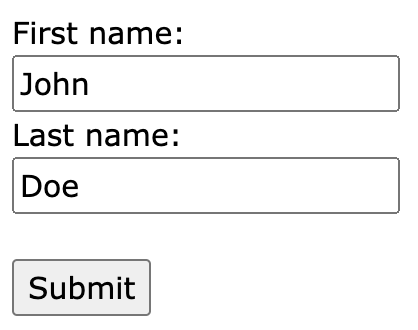
Now that you've read about the elements of a form, you can create a simple form using each of these elements like so:
<form action="https://server.com/action_page">
  <!-- Label and text box for the first name -->
  <label for="fname">First name:</label><br>
  <input type="text" id="fname" name="fname" value="John"><br>

  <!-- Label and text box for the last name -->
  <label for="lname">Last name:</label><br>
  <input type="text" id="lname" name="lname" value="Doe"><br><br>

  <!-- The submit button -->
  <input type="submit" value="Submit">
</form>
The code above renders like this in the browser:
You may have noticed the form tag has an action attribute. action specifies the URL
to receive the form's data when the user clicks the "Submit" button. You'll learn more about submitting data
in a later reading.
How to Build It
To create a simple form in your React app, you could use the same syntax inside the JSX.
export default function App() {
  return (
    <>
      <form>
        <label>
          Username:
          <input type="text" />
        </label>
      </form>
    </>
  );
}
Notice that in the example above, we wrap the text input inside a <label> element. This
is an alternative (arguably easier) way to add labels to inputs. As a next step, you would add attributes
like name and id for the input, a submit button, and an action URL.
While this React form looks exactly like HTML, remember you are dealing with JSX here. You can add code
inside the JSX to create dynamic and smart forms! Moreover, React can maintain state for inputs inside the
<form> element, as you will learn later in this Core Competency.
Changing form values
Let's learn how to access a form input's value and track real-time changes in your React app. But first, a quick recap.
In JavaScript, you can access the value of any form input by selecting the corresponding DOM element. Consider this form below:
<form>
  <label>
    First name:
    <input type="text" id="fname" name="fname" value="John" />
  </label>
  <label>
    Last name:
    <input type="text" id="lname" name="lname" value="Doe" />
  </label>
  <input type="submit" value="Submit" />
</form>
To access the current value of the "first name" input, you can select the DOM element and access its value property:
console.log(document.getElementById("fname").value);"John" will be logged since it is the default value. But whenever you access the value property, you get the input's current value, so you must ensure that the user has finished typing before reading the property. Or you can use an event handler to be informed about any changes in the input!
The DOM will generate an event every time the input is updated. You can add the oninput attribute to the input element and monitor changes in real time:
<input oninput="monitor()" type="text" id="fname" name="fname" value="John" />The value of oninput is the function called when the input changes. If you wanted monitor() to log the value after every change, you could do this:
function monitor() {
  console.log(document.getElementById("fname").value);
}
An alternative approach is to leverage pure JS to assign the handler and access the event object:
const firstName = document.getElementById("fname");
firstName.oninput = function (e) {
  console.log(e.target.value);
};
So far, so good. Now, let's see how to track values and changes in React.
How to Build It
Within JSX, the onChange attribute will behave precisely like JavaScript's oninput. You can choose to either write the handler code inline:
export default function App() {
  return (
    <>
      <form>
        <label>
          Username:
          <input
            type="text"
            onChange={(event) => console.log(event.target.value)}
          />
        </label>
      </form>
    </>
  );
}
Or declare the handler as a named function inside the component:
export default function App() {
  const logEvent = (event) => {
    console.log(event.target.value);
  };
  return (
    <>
      <form>
        <label>
          Username:
          <input type="text" onChange={logEvent} />
        </label>
      </form>
    </>
  );
}
Now, let's create some state to store the input's value and make it available to the component (and its children) at any time. Don't forget to import useState:
import { useState } from "react";

export default function App() {
  const [username, setUsername] = useState("");
  const saveUsername = (event) => {
    setUsername(event.target.value);
  };
  return (
    <>
      <h1>Username: {username}</h1>
      <form>
        <label>
          Username:
          <input type="text" onChange={saveUsername} />
        </label>
      </form>
    </>
  );
}
Although you are not submitting the form now, notice how the <h1> content will dynamically update as you type! React will render the component every time the state is updated.
If you hit enter to submit the form, the page will reload, and you will lose the state. The next Learning Objective will teach you how to deal with form submission.
Submitting a form
The beauty of JSX when building forms is that you can use an HTML-like syntax while adding arbitrary code to create dynamic components.
You have learned how to track input changes in real-time using state, and now you will learn how to handle form submissions.
Like with HTML, a <form> element can have a onSubmit attribute, which will assign an event handler to run additional code when the user submits the form data:
<form onSubmit={handleSubmit}>
    <label>
      Your Name:
      <input type="text" />
    </label>
</form>

const handleSubmit = (event) => {
  event.preventDefault();
  // Access state variables, send GET or POST request.
};
By preventing the default action, you can intercept the submission and cancel the default behavior that would refresh the page. Then, you can add code to your handler to process/submit data and receive/handle the response from the back-end server.
How to Build It
Continuing with the App component from the preview page, you can add the handler function and the onSubmit attribute to the form:
import { useState } from "react";

export default function App() {
  const [username, setUsername] = useState("");
  const saveUsername = (event) => {
    setUsername(event.target.value);
  };
  const handleSubmit = (event) => {
    event.preventDefault();
    // Access state variables, send GET or POST request.
  };
  return (
    <form onSubmit={handleSubmit}>
      <label>
        Username:
        <input type="text" onChange={saveUsername} />
      </label>
    </form>
  );
}
In a real scenario, the handler would call fetch or axios.get to send the HTTP request right after event.preventDefault(). Let's use console.log to test the handler and also add a simple submit button to the form so the user can either press Enter or click the button:
import { useState } from "react";

export default function App() {
  const [username, setUsername] = useState("");
  const saveUsername = (event) => {
    setUsername(event.target.value);
  };
  const handleSubmit = (event) => {
    event.preventDefault();
    console.log(username);
  };
  return (
    <form onSubmit={handleSubmit}>
      <label>
        Username:
        <input type="text" onChange={saveUsername} />
      </label>
      <input type="submit" />
    </form>
  );
}
Handling multiple inputs
Handling multiple inputs can get awkward in React apps. For every additional form input, you must add code to the JSX output, create a new state, and write a new handler. In no time, your component will become bloated with repetitive code, which is hard to read and maintain.
To avoid this, you can use a design pattern that prioritizes the use of objects as state variables and a single multi-purpose handler that can be assigned to several form inputs. The concept is simple and effective: an object can hold several values simultaneously! But first, you must understand the syntax of updating state objects in React.
Take a look at the following state variable:
const [obj, setObj] = useState({
  key1: "value1",
  key2: "value2",
});
Because of the way JS handles objects in memory, you can't update value1 or value2 independently and directly. The setObj function expects to receive a complete object when updating the state. The solution is to create a temporary copy of the existing object, update what needs to be changed, and then pass the final complete object to the function. In JS, one of the best ways to accomplish this is to use the spread operator ...:
//First, you create a copy of the object since you are not supposed to modify state directly:
const objCopy = { ...obj };

//Then you change what you need:
objCopy.key2 = "newValue2";

// and finally you call setObj() to update the state:
setObj(objCopy);
You could combine the first two steps above in a single statement using this syntax:
//Create a copy and update the object:
const objCopy = { ...obj, key2: "newValue2" };
setObj(objCopy);
You can even shorten the code further and get the job done in a single statement:
setObj({ ...obj, key2: "newValue2" });Nice! Remember, this is how you are supposed to update state objects! Using an object, you can add a lot of data in a single state variable instead of creating a separate state for each form input. Notice, however, that the setObj function in our example is hard-coded to update key2. What if you wanted to use a single function to update any key with any value?
How to Build It
Let's start with the value. You have been using event.target.value to receive the current input value inside the onChange handler. Study the code below:
import { useState } from "react";

export default function App() {
  const [name, setName] = useState({ firstName: "", lastName: "" });
  const saveFirstName = (event) => {
    // an onChange handler for saving firstName
    setName({ ...name, firstName: event.target.value });
  };
  const saveLastName = (event) => {
    // an onChange handler for saving lastName
    setName({ ...name, lastName: event.target.value });
  };
  // Luckily, this form is only two inputs big, but what if the form had many more inputs?

  const handleSubmit = (event) => {
    event.preventDefault();
    console.log(name);
  };
  return (
    <form onSubmit={handleSubmit}>
      <h1>First Name: {name.firstName}</h1>
      <h1>Last Name: {name.lastName}</h1>
      <label>
        First Name:
        <input type="text" onChange={saveFirstName} />
      </label>
      <label>
        Last Name:
        <input type="text" onChange={saveLastName} />
      </label>
      <input type="submit" />
    </form>
  );
}
Notice how you use only one state variable to store all the form data! This is great, but you still use a separate event handler for each form input. Let's improve the code with another syntax sugar. JavaScript allows you to compute the key during runtime using brackets []:
// The code below:
const newFirstName = { ...name, firstName: event.target.value };
// Is effectively the same as:
const keyString = "firstName";
const newFirstName = { ...name, [keyString]: event.target.value };
To create a single multi-purpose function that can update any value in the object, you must pass the key string as an argument. Since the onChange handler automatically receives the event object, a good solution is to add an extra name attribute to each input, which matches the corresponding key in the object, and extract name from the event object. Check the final code below:
import { useState } from "react";

export default function App() {
  const [name, setName] = useState({ firstName: "", lastName: "" });
  // only one handler, which extracts key and value from the event object
  const saveName = (event) => {
    setName({ ...name, [event.target.name]: event.target.value });
  };
  const handleSubmit = (event) => {
    event.preventDefault();
    console.log(name);
  };
  return (
    <form onSubmit={handleSubmit}>
      <h1>First Name: {name.firstName}</h1>
      <h1>Last Name: {name.lastName}</h1>
      <label>
        First Name:
        <input type="text" name="firstName" onChange={saveName} />
      </label>
      <label>
        Last Name:
        <input type="text" name="lastName" onChange={saveName} />
      </label>
      <input type="submit" />
    </form>
  );
}
Your component is now shorter and ready to be easily upgraded with new form inputs!
Using controlled inputs
At this point, you are practically a React form master! But there's another essential trick to learn: controlled inputs.
As a developer, you must always consider the uncertainty of user behavior. The whole point of designing an excellent user interface is minimizing errors and bad user experiences. Form inputs, if not very well organized and implemented, often lead to bugs in the application.
Here are some example use cases that require extra coding logic:
- If the user's age is less than 16 years, the user should not be able to enter the driver's license number;
- A text input for a name should contain only letters;
- A zip code must follow a specific pattern, with five numbers and possibly an option for 5 + "-" + 4 numbers.
If the application does not manage, validate, or control the inputs in real-time, the user will assume that the values entered or selected are valid. Down the line, an invalid value can generate critical errors. For instance, what happens when a function expects two numbers but tries multiplying 2 by "A"?
That's why you should control inputs, especially when they are critical to the app logic and the user experience.
Controlled Inputs
In this Learning Objective and throughout the rest of the program, the term "controlled input" pertains to an input that undergoes real-time validation by the application, potentially being modified to meet validation criteria and subsequently displayed back to the user interface to provide visual feedback. While "validating" and "controlling" may be interchangeable in certain contexts, here, "controlling" encompasses a broader scope.
How to Build It
Let's say you want to add a Social Security Number input to your form. While there are many types of validation to confirm if a particular SSN# is valid, let's create a simple input control to ensure that the user has typed nine numbers and automatically add the - characters in the correct positions.
The first step is to control the input value in real-time through an event handler called controlSSN, which will update the state after every change in the input. Next, you need to add code to populate the input with the current state. This is done with the value attribute inside the <input> element. Finally, when the user submits the form, you could add code to reset the state (and thus the input field on the screen).
Take a look at the following implementation of controlSSN:
import { useState } from "react";

export default function App() {
  //SSN is a string, initialized empty
  const [ssn, setSSN] = useState("");
  // the handler will control the input and update the state
  const controlSSN = (event) => {
    // first we create a temp variable to format the final value
    let social = event.target.value;
    // the hyphen character will be added automatically
    if ((social.length == 3) | (social.length == 6)) {
      social += "-";
    }
    // the string limit is 11 characters
    if (social.length > 11) {
      social = social.slice(0, -1);
    }
    setSSN(social);
  };
  // the state will be reset to an empty string upon form submission
  const handleSubmit = (event) => {
    event.preventDefault();
    console.log(ssn);
    setSSN("");
  };
  //Notice the "value" attribute in the input, which will populate the form with the current state
  return (
    <form onSubmit={handleSubmit}>
      <label>
        SSN#:
        <input type="text" onChange={controlSSN} value={ssn} />
      </label>
      <input type="submit" />
    </form>
  );
}
This is how you implement the three basic steps to add a controlled input:
- Validate the input and update the state accordingly;
- Use the value attribute to display whatever you want in the input field (often, the state itself);
- Clear the input upon form submission to indicate to the user that data was submitted and the input is ready to accept a new value.
Granted, this is a simple input control. As it is, the user could still type letters (which should not be accepted), and the backspace key will not work as expected. This shows that input control is not always trivial but will help your application perform flawlessly!
Let's improve our control. The submission handler could check if the user has typed nine numbers (11 characters in total). Just add a disabled attribute to the submit input like this:
<input type="submit" disabled={ssn.length != 11} />And just like magic, the submit button will be inactive until the user types nine characters!
The next step would be to prevent the user from typing non-number characters. In JS (and in most languages), this is often implemented via Regular Expressions (RegEx). You will learn more about input validation in the next module, but feel free to start exploring RegEx in JS by visiting this Regular Expressions.
Conclusion
Now you know how to create forms in React, monitor input changes, use state to store values, intercept the form submission, optimize the code for multiple inputs, and even validate and control the user's behavior.
That's a lot, and you should be proud!
In the next module, you will continue to explore form management and learn some advanced concepts. See you there!
Module 2 Project: Form Management
This project will have you build a form. Your task is to implement a form capable of creating new team members. One convenient advantage of forms is that you can use the same form to edit existing resources, which is another requirement of this project. By the end, you will have a list of team members that you can add to and edit.
The module project contains advanced problems that will challenge and stretch your understanding of the module's content. The project has built-in tests for you to check your work, and the solution video is available in case you need help or want to see how we solved each challenge, but remember, there is always more than one way to solve a problem. Before reviewing the solution video, be sure to attempt the project and try solving the challenges yourself.
Instructions
The link below takes you to Bloom's code repository of the assignment. You'll need to fork the repo to your own GitHub account, and clone it down to your computer:
Starter Repo: Form Management
- Fork the repository,
- clone it to your machine, and
- open the README.md file in VSCode, where you will find instructions on completing this Project.
- submit your completed project to the BloomTech Portal